Saturday, June 29, 2013

White with a Little Splash of Color!

Hello!  Well, I am trying to do a little better at getting my cards done and out in the mail in time for the recipient to receive it on their birthday.  Unfortunately, my niece had to wait for this one...Hay, handmade cards take time to come up with and then to make them!  Right?  Or, Better late than never! 
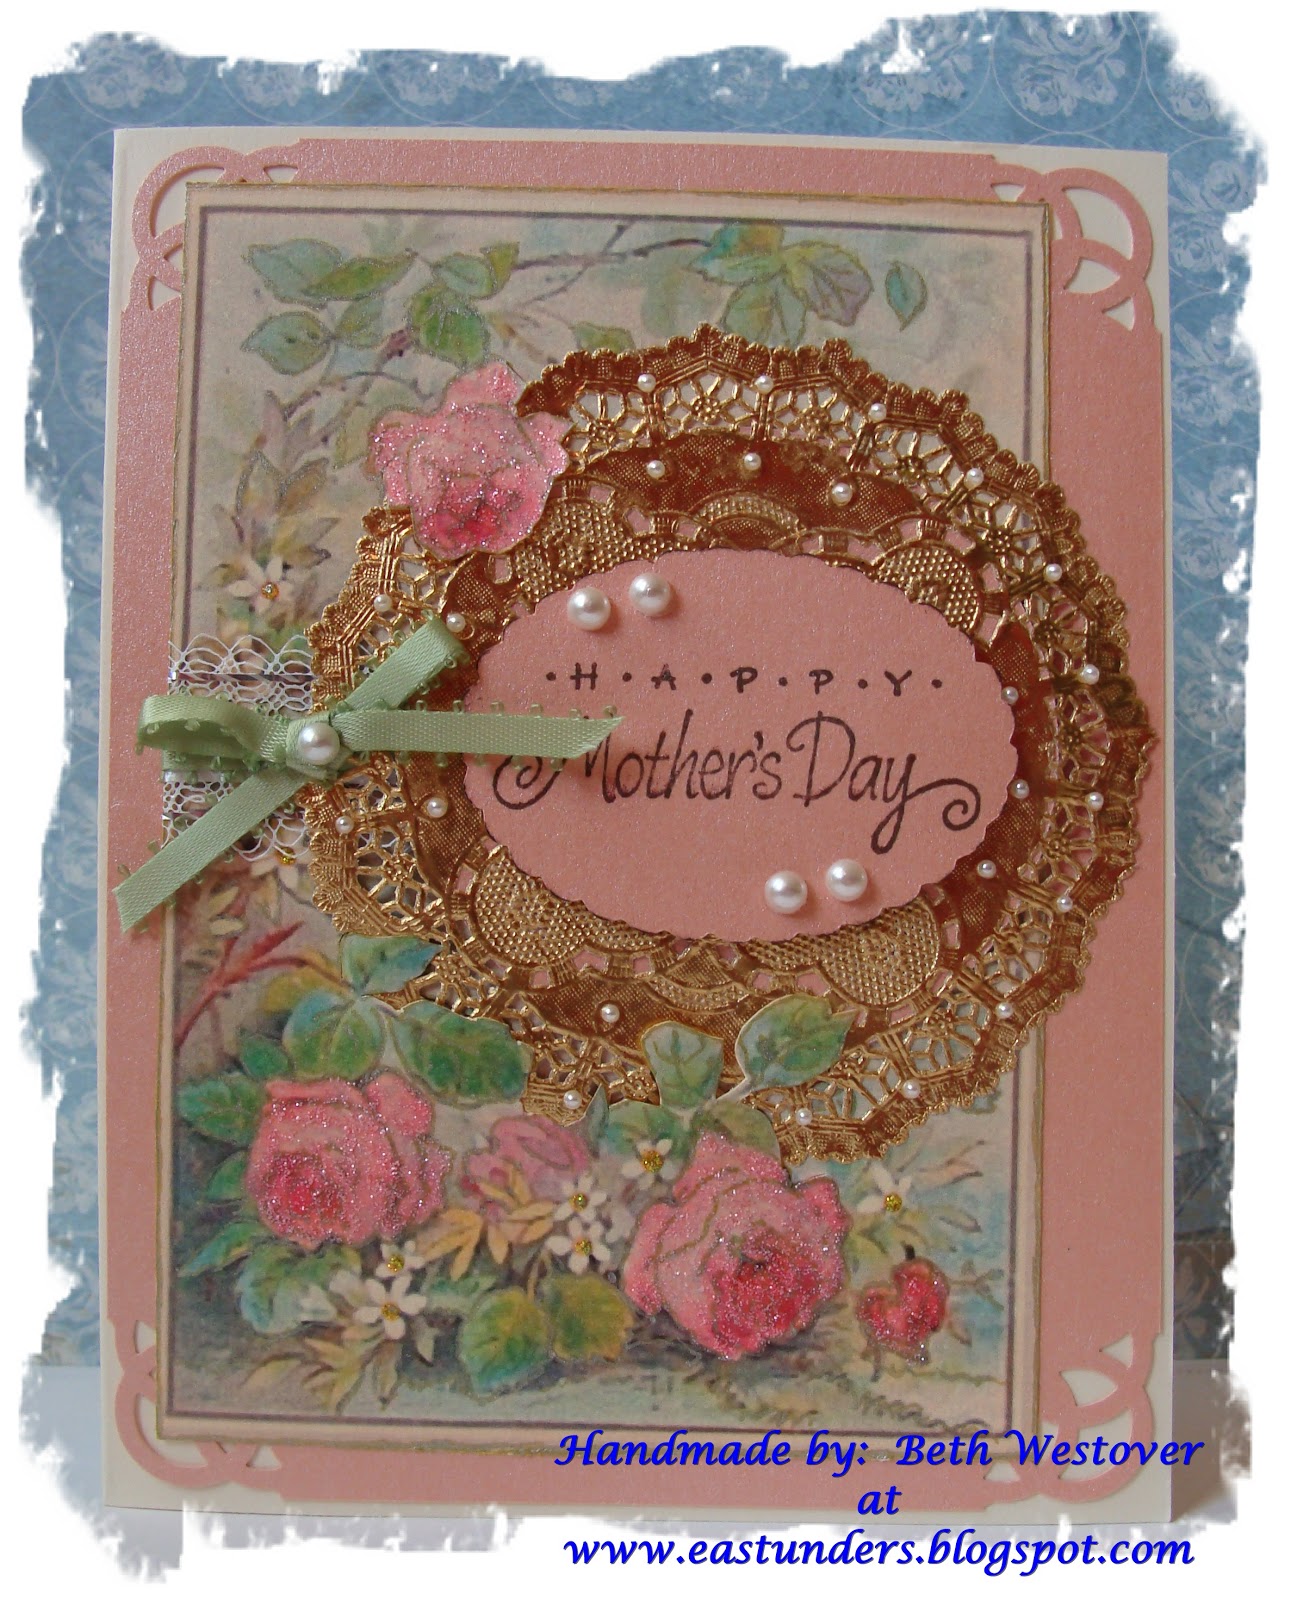
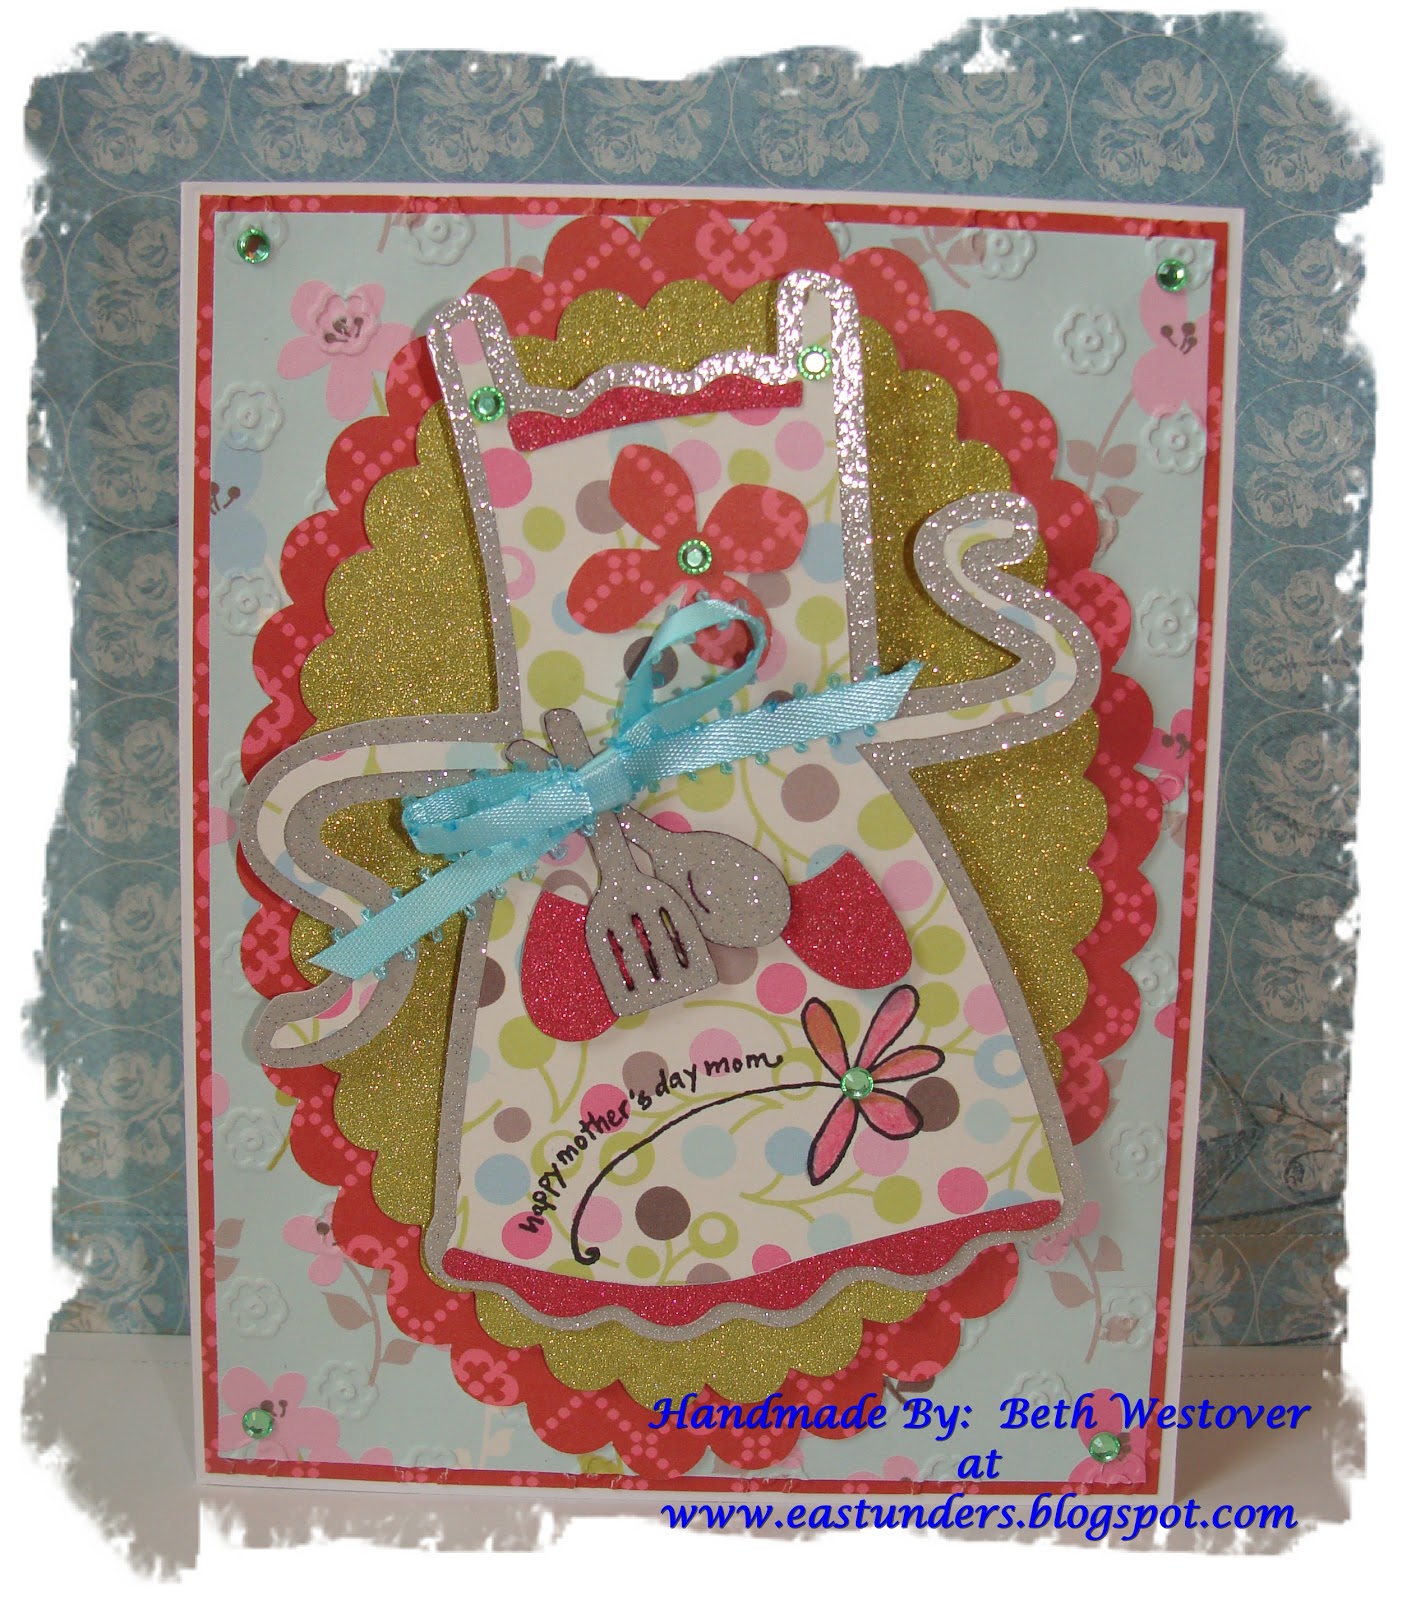
Okay, enough excuses!  LOL  This card didn't take to long to make once I figured out what I was doing.  Simple and elegant!  I like the use of the negative space for the flower...I am thinking the next time that the background paper behind the flower should be colored and then the flower could be white...we shall see.

I used:
White Cardstock
Core'Dinations Pearls cardstock
Sweet Treats Cricut Cartridge for the flower cuts
A Child's Year Cricut Cartridge for the Scalloped edge for the HB Sentiment
Love's in the Air CuttleBug Embossing Folder
Martha Stewart Glitter
Pink//Yellow Stickles
Pink Satin Ribbon from my stash
Lace flowered Ribbon from my stash
HB Stamped Sentiment from Hobby Lobby

Thank you so much for coming by and checking
out my work! 
 I hope you have a wonderful day filled with many blessings!
 

Monday, June 17, 2013

It's Graduation Time!

Hello, I hope you all are doing well!  We are keeping busy with graduations and Father's day and open houses...and whatever else we can squeeze in between!  In between all the craziness I took the time to make some graduation cards!  They all turned out pretty good.  Some I have done the same design before, but it is a good one, with just different papers and colors.  So enjoy!

For the Tent fold card
I used:
The Paper Studio Graduation paper
Red/White Cardstock
Grad Sentiment Stamp from Hobby Lobby
Black Tassel from Hobby Lobby
Gold Glittered Brad from Stampin Up!
Here is a link to a good tutorial of a Vertical Tent Fold Card.
 
For the crisscross card
I used:
DCWV Glittered the All Dressed Up Stack for the BG paper
The Paper Studio Graduation Papers
White/Red Cardstock
Grad Sentiment stamp is from Hobby Lobby
Black stickled dots
 
For the Girly Owl
I used:
Create A Critter Critter Cricut Cartridge
DCWV The Natural Stack
Black/White/Orange Cardstock
Googly Eyes
Paper/felt flowers from my stash
Handmade tassel by me
White gel pen
 
Well that is it on the graduation cards for now!
Thank you so much for stopping by! 
Take some time and look around a little!
Have a fantastic day!


Saturday, June 8, 2013

Birthday Couple!

Hello all!  I hope you all are doing well!  I know we have been VERY busy around here, and it just does not seem to let up.  Just trying to squeeze in a few things here and there, on top of all the other things going on in our crazy lives.  I love being busy, but sometimes it can get to you and you just need to rest a bit.  Anyway, part of my busy-ness is due to procrastination.  Then when you have procrastinated and others things get added to the pile suddenly you are really going nuts!  I am sure none of you have this problem!   Well, I just found out this week that my hubby's Uncle and his wife had their first wedding anniversary...so I quickly put together a card for them.  I was in such a hurry, that I failed to get a picture!  Humph!  Then I find out that both of their birthdays are coming up just a week later...so I have made them both a card and this time I got pictures!  Plus, we have had several graduates this year, and more birthdays and in between all of this is Father's Day cards.  Whew!  Anyways, here are the birthday cards for our Uncle and Aunt!

For the Cake in a stand
I used: 
DCWV The Sweet Stack
DCWV The Glitzy Glitter Stack for the blue background paper
White Cardstock for the punched edge
Happy Birthday Cuttlebug embossing folder
Stampin Up! Sweet of You stamp
Stampin Up! Crystal Effects for the dome over the cake
Red/Pink Stickles
HB sentiment stamp from my stash
Ribbons from my stash
Martha Stewart punch for the "Lacy" edge
 For the bicycle card
I used:
DCWV The Natural Stack for the background
Core'dinations Core Impressions: Timeless Collection
Off white cardstock
Cuttlebug Clockworks embossing folder
Stampin Up! Feeling Sentimental stamp of the bicycle
HB Sentiment from Hobby Lobby
I-Rock Gems
Twine
Tim Holtz Distress ink Corduroy
Well, thank you so much for stopping in! 
 I hope you have time to slow down
 and smell the roses in life!
 

Friday, June 7, 2013

Gaming Birthday!

Hello dear friends! So I have been busy like crazy and have failed to take the time to post any of my projects as of lately.  There are many more cards being made and in the process as I type this!  So stick with me through this next month as I will be posting many more...later!
Well, my nephew had his big 13th birthday about two weeks ago and yes I am just now getting around to sharing it with you all!
He is really big into the X-Box games and such and I always try to do a card that has to do with whatever they are interested at that time.  So naturally, I had to make something to do with the X-Box.  So this is what I came up with!  He seemed to love it, when he opened it he nodded his head and with a big grin, said, "Oh yeah! Now that is what I am talking about!" LOL

I used:
Plantin SchoolBook Cricut Cartridge
Cricut Craft Room Basics Cartridge
Recollections Comic Heros paper
Two shades of grey carstock
Sizzix Dots on a Line Embossing Folder
Colored brads
Stampin Up! Crystal Effects for the "X-Box Logo"
Action Wobble
The Sentiment is computer Generated
Brown bakers twine
Well, thank you for taking a peek at what
 I have been doing!
I hope you have a great day!


Monday, May 13, 2013

Mother's Day Cards

Hello everyone!  I hope that all you moms, had a wonderful Mother's Day, yesterday!  I know I did.  I love having my families come to my home. We have such a wonderful time of just eating and talking and the kids having fun with eachother.  It is just so much fun!  Both of our moms were honored with special gifts from each of us and spoiled with not having to cook for the day. 
Unfortunately, this year I did not have the time to make something "fancy" for my Mom and my Mother in Law, but I did make them a card.  Things have been so very crazy around here as of lately.  So here are the cards that I made for the Moms in my life...including my sisters/in laws, grandma. Most of these were done in in one day!  So, as you can see I was very busy this past week, not to mention all the other things I squeezed in all week long! I really enjoyed doing these!

For the Mother with Children Card I Used:
Free Vintage digi-stamp of Mother and children
The Paper Studio Mirabelle Carstock for the BG papers
Gold paper Doily
D'vine Swirl Cuttlebug folder on the BG
Stamp Sentiment from Hobby Lobby
Paper Roses from my stash
Martha Stewart Scallops corner punch
Gold Pen to accent some of the image
Adhesive pearls for the buttons on the mother's blouse
Burgundy and gold ribbon from my stash
For the Gazebo Card I Used:
Spring Cottage Cricut Cartridge for the gazebo and flowers
White and black cardstock for the gazebo
Green cardstock for the green on the flowers
K&Company Life's Journey paper for the BG
DCWV The Glitzy Glitter Stack for the pink and blue flowers and butterflies
Martha Stewart butterfly edge punch for the butterflies
Flower Soft: Sweet Pea & Meadow
Adhesive pearls
Stickles: Yellow and blue for the flower centers

For the Gold Doily and Roses Card I Used:
Printable Stationary from Pinterest
Gold Paper Doily
Pink Stickles
Adhesive Pearls
Martha Stewart Scallop Punch
Green and Lacy white ribbon from my stash
Stamp Sentiment from Hobby Lobby 
 
 
For the Teapot Action Wobble Card I Used:
Kate's ABC Cricut Cartridge for the Teapot
Paper Dolls Everyday Cricut Cartridge  for the teacup
Colorbok Rosewood for the BG paper
K&Company Life's Journey paper for the teapot and cup
Core'Dinations Carmaker Series Pearls paper for the plain pink parts
Gold paper Doily
Action Wobble
Adhesive Pearls
Pink Satin Ribbon from my stash
Stamp sentiment from Hobby Lobby
 
For the Apron Action Wobble card, I Used:
Country Life Cricut Cartridge for the Apron Cut
Paper Doll Everyday Cricut Cartridge for the spoon and spatula cut
Cricut Craft Room Basics for the scalloped oval cuts
DCWV  The Sweet Stack for the pink BG papers
Firefly Paper Pack from Big Lots
DCWV The Glitzy Glitter Stack for the green scalloped background cut and the BG cut of the apron
Martha Stewart Hydrangea Punch
Blue Ribbon from my stash
Rhinestones from my stash
Stamped Sentiment from Hobby Lobby

Well, thank you so much for stopping in!  Take a look around more on my blog and leave a comment.
I hope you have a fantastic day!

Entering into these challenges:

http://dianamlarson.blogspot.com/2013/05/dlart-thankful-thursday-linky-challenge.html

http://dianamlarson.blogspot.com/2013/05/dlart-thankful-thursday-challenge-109.html

Sentimental Sundays


Sunday, May 5, 2013

16th Birthday

Well, 16 years ago on May 3rd, we had our first baby.  I can't believe she is growing up so fast.  She is turning into such a wonderful young lady, who loves the Lord and is so full of joy and compassion for people trapped into slavery.  We are so proud of her and all that she is doing.  Well, she has alot of things she loves and enjoys.  One of those things is the TV show, "Doctor Who" and the Tardis!  When I asked her what she wanted on her cake, her response was, "I want a Tardis!"  Well, due to "Copyright laws" the bakery would not do it, soooo I had to find another way to put it on her cake.  Then I remembered a Pinterest post about making one out of a milk/juice carton.  So that is where it all began.  Plus, I knew I wanted to make her a card using the Cricut Craft Room to design a Tardis for her.  Well, this is what I came up with...not bad for doing it all in 1 week. 
Another thing she loves is the mustache "fad" that is going on right now.  So her birthday party had two things going on, Doctor Who and Mustaches!  I made lots of mustaches and bow ties and put them on on sticks or on straws!  Everyone had fun with all of that.  We had a great time celebrating a special young lady with family and friends!

For the Cake Tardis I used:
Juice/Milk carton
Primer Paint
Acrylic Paint Royal Blue
Textured blue cardstock
The windows are computer generated
Wooden Spool for the light on the top


Next the Tardis card:
I Used:
Cricut Craft Room Basics Cartridge for the door and window cuts
Textured Cardstock
DCWV Glitter Stack For the windows and light
Sentiment computer generated
 
 
My Beautiful 16 year old!
 
Well, thank you so much for stopping by and I hope you have a wonderful day!
 

Wednesday, April 17, 2013

Garden Cascade

I have been one busy girl here lately!  I really enjoy making cards for people!  Well, this unique "Cascade" card was made for my niece who is turning 17 today!  Woohooo!  Where does the time go, and why do these kids have to grow up so fast?  I wanted to make this for her and had this all planned out in my head about 2 weeks ago and even started on it about a week early.  Then as I worked on it, I got a little stumped on my inspiration for it.  So it sat for a while until I had a chance to get back to it.  Does anyone else have that problem?  I was going for the elegant "garden" look.  I am fairly pleased at how this turned out though.  I just hope she really likes it and doesn't see this post before she receives it!  LOL  This "cascading" technique is rather simple to make, but there are several different styles/folds/sizes to choose from.  I made mine by combining several different tutorials that I found here on-line. So it really is open to your own interpretation of what you want it to look like.  Anyways, I hope you enjoy what you see and maybe you will give it a try too!

I used:
Poutpouri Basket Cricut Cartridge:  Ivy
Paper Dolls Dress Up Cricut Cartridge:   flowers and grass 
Spring Cottage Cricut Cartridge:  Fence, Gate/arbor, Bird, Tulips
Martha Stewart- Deep Edge Punch - Trellis
Blue Textured card stock for the base
Colorbok Pattern Pack: Rosewood for the background papers
White card stock for the trellis, fence, and gate/arbor
Light and dark green card stock for the backgrounds and the ivy
DCWV The Glitzy Glitter Stack for the flowers and the birds
Sentiment is a stamp from Hobby Lobby
Dimentional Tape


Thank you so much for stopping by! 
I hope you have a day filled with many blessings! 
 

Saturday, April 13, 2013

Baby Duck Bubbles

Yep, I have been at it again...making cards that is!  Well, this time it is for a new baby girl.  I love doing baby cards!  The cuter the card is, the better, right?  I recently got my hands on some "Action Wobbles" and was so excited to use one.  So I thought of a "rubber ducky" that looks like he is floating in a bunch of bubbles. When I make the duck wobble, the googly eye rattles and the whole thing just makes me laugh!  I love it!  I got the bubble cuts from several different cartridges, then I would "hide" some of the cuts that I did not want. Well, here it is!

I used:
Cricut Craft Room and Cricut Expression
A Child's Year Cricut Cartridge:  Card Shape, Back Ground cut, Bubbles, ducks,
Kate's ABCs Cricut Cartridge:  Bubbles
Paper Dolls Everyday Cricut Cartridge:  Bubbles boarder
DCWV The Glitzy Glitter Stack for the bubbles
K&Company Specialty Paper (Valentine's) for the Card
DCWV The Sweet Stack for the Back Ground paper and the inside back ground base
Yellow textured card stock
Acetate "Sheet" for the inside bubbles and ducks
Action Wobble
Googly eye from my stash
Green Satin Ribbon from my stash
Sentiment is computer generated
White Gel pen around the duck body
Orange Stickles on the duck bill


Sorry about the hand, but I wanted you to get an idea of what it kinda looks like while the Action Wobble is moving!  I LOVE it!
 Here is the inside of the card with the center pleated pop up, of the ducks and bubbles!
 
Thank you so much for stopping in! 
 I hope you have a great day!


Friday, April 5, 2013

White On White Anniversary

Wow, it sun shining here in my little part of Ohio!  The temperatures are finally staying above 40* during the day although at night it is still dipping down to the 20* mark.  It is soooo nice to see the sun though but I still love winter and the beautiful snow, but it is time for the warmer temps. and sun.  Anyways, I finally did it!  Aren't you proud of me?  I successfully made a white on white card without adding any color!  That was really difficult for me to do.  If you take a look at all my cards you will see that I LOVE lots of color and the more bold in color the better!  LOL  So yes, this card was hard for me!  :-)   I have always wanted to make one and I just felt like I would never succeed at it.  Well, with the help of wonderful Cricut and some "fancy" cuts and lots of layers and dimensional tape, I was able to pull it off!
I did make this card for my Sister and her hubby for their wedding anniversary.  They have had some huge hurdles/hoops to go through with struggles and changes in life and they are still managing to hold onto the marriage that God gave them.  They are growing closer to God and to each other as  they enter this new phase of their relationship/marriage.  I pray that their love for each other and for God will continue to grow stronger and have a deeper passion.  I am proud of them both.  May God bless them with many more years of greater love for each other.

I used:
White Card Stock
A Child's Year Cricut Cartridge
Potpourri Basket Cricut Cartridge
Cuttlebug Folders:  Love's In the Air, D'vine Swirl, and Polka Dots
Stickles: Crystal
Dimensional tape
White Ribbon from my stash
Stamp Sentiment from Hobby Lobby


Here is a closer look at all the layers and embossing!
 
Thank you so much for stopping in! 
I hope you have a day filled with many blessings!

Wednesday, March 27, 2013

Fishing You A Happy Birthday

Hello, again!  Well, this week was my son's 14th birthday!  He is into all kinds of things, so that made it really hard for me to pick something out to do on his card.  It is already hard enough to make a masculine card for guys.  Oh well!  I did start to notice a pattern in the gifts that we bought for him and that stimulated my idea for his card.  We bought him a nicer fishing pole and some lures and bobbers and "fishing sunglasses".  So do you notice the pattern, too?  Well that got me thinking and such.  So as a result this is what I came up with with a little help of inspiration from another card I made a while ago for someone else!  I am fairly pleased how it turned out!  He seemed to like it too.  He really just enjoyed being the center of attention and just had a great time "playing" around with everyone!  Good reason for good friends and family to come over and enjoy good food, fun and fellowship with each other...along with a Nerf War thrown in the mix!  LOL

I used:
A Childs Year Cricut Cartridge for the boy fishing
Everyday Paper Dolls Cricut Cartridge for the basket
DCWV The Natural Stack for the Background
Different colored inks blended in together
Stickles rubbed on the different colors just to add a little something special
Orange Ribbon from Hobby Lobby

Well, thanks for stopping in!
 I hope you all have a day filled with many blessings!