Monday, October 10, 2011

Some Scraps & A Thank You

This card was made somewhat from my scraps drawer. This month is pastor appreciation month and my hubby informed me at about 12am Satuday night that we needed a card for our pastor,  for everyone to sign the next morning. Ahhhh! No pressure!  Then I remembered that I had this stamp already colored and cut on a circle.  I also knew it would be the perfect color scheme for a more gender neutral type of card, being that the apprection is not just for our pastor, but also his wife, who sacrifices so much for her husband to serve and give so much time to the church.  So I started on the card and ran with what I had to get it started...Thank God for scraps and quick creative thinking! So this is what I came up with that night in about an half hour. Not bad if I do say so myself. Whew! That was just a little of a short notice, but sometimes I think my best work come from those moments of "short notice".  At the same time I love that my husband has gotten so used to me making cards that he likes and expects me to make all of them from now on...except when the card is for me, of course!  LOL

I used:
Plantin SchoolBook Cartridge for the circle cut
Spellbinders Nestabilities Lacy Squares
DCWV The Linen Closet Stack paper for the BG paper and the square
K& Company Life's Journey for the brown  BG paper
Stampin Up! Butterfly picture (not sure what that set is called anymore)
Recollections stamps from Michael's for the sentiment
Pebbles Inc. Chalk to color the butterfly and give it all a little sparkle
Ribbon from my stash

I hope you all are having a great day and thanks for
stopping in!

Wintery Window

Okay, now I am getting a little to carried away with my "shaker" cards. I am very pleased with how this one turned out! I am not sure who will receive this one, but I will have to "hand" this to someone and not mail it. We will see! These are alot of fun to make. My problem is that I can't wait to put the acetate on and the glitter between to see the "snow globe" affect, but I have to wait for the stickles to dry before I do all that.  Arrrr!  I do heat it up a little with my heat gun, but that tends to make it bubble/blister if I am not careful.  I guess, patience is not one of my virtues!  I will make my tutorial for this in the next few posts, so be watching for it! 
 
I Used:
Christmas Cartridge for the trees, and house
Christmas Cards Cartridge for the actual shape of the card
Winter Woodland Cartridge for the branch across the top
Plantin SchoolBook Cartridge for the basic card shape
Gypsy Wanderings Cartridge for the frame around the window and for making the acetate cuts slightly larger
DCWV The homemade Christmas Stack for the card and the frame
DCWV The Glitter Stack card stock
Acetate (from Office Max)
Green,  two different browns of card stock for the house, and trees
Glitter (from my Aunt)
Ribbon from Michael's (last year)
Stampin Up! Bells & Boughs (for the Merry Christmas sentiment)


Thanks for taking a look and I hope you have a very wonderful day!


Tuesday, October 4, 2011

Winter Wonderland Snowglobe

Hello, my friends!  Okay,I said that I might try coming up with my own design for the "shaker" cards.  Well this is what I came up with.   I had fun making this one! It turned out way better than I thought it would! A little bit of trial and error but I figured it out and am now pleased with it enough to show it to you all.  I may make more of these...or not, but not with the same picture inside.

I used:
Christmas Cartridge for the trees and snowflake and the church
Plantin SchoolBook Cartridge for the circles
Winter Woodland Cartridge for the words on the base
My Minds Eye O Christmas Tree Cardstock
DCWV The Homemade Christmas Stack
DCWV the glitter card stock stack
Acetate
Rhinestones
Ribbon from Michael's
Pop Dots cut to fit around the circle
Bottle of glitter (was given to me)


This is a side view, to show you the depth of it! 

 Well, I hope you are having a great day!

Monday, October 3, 2011

Christmas Shaker Cards

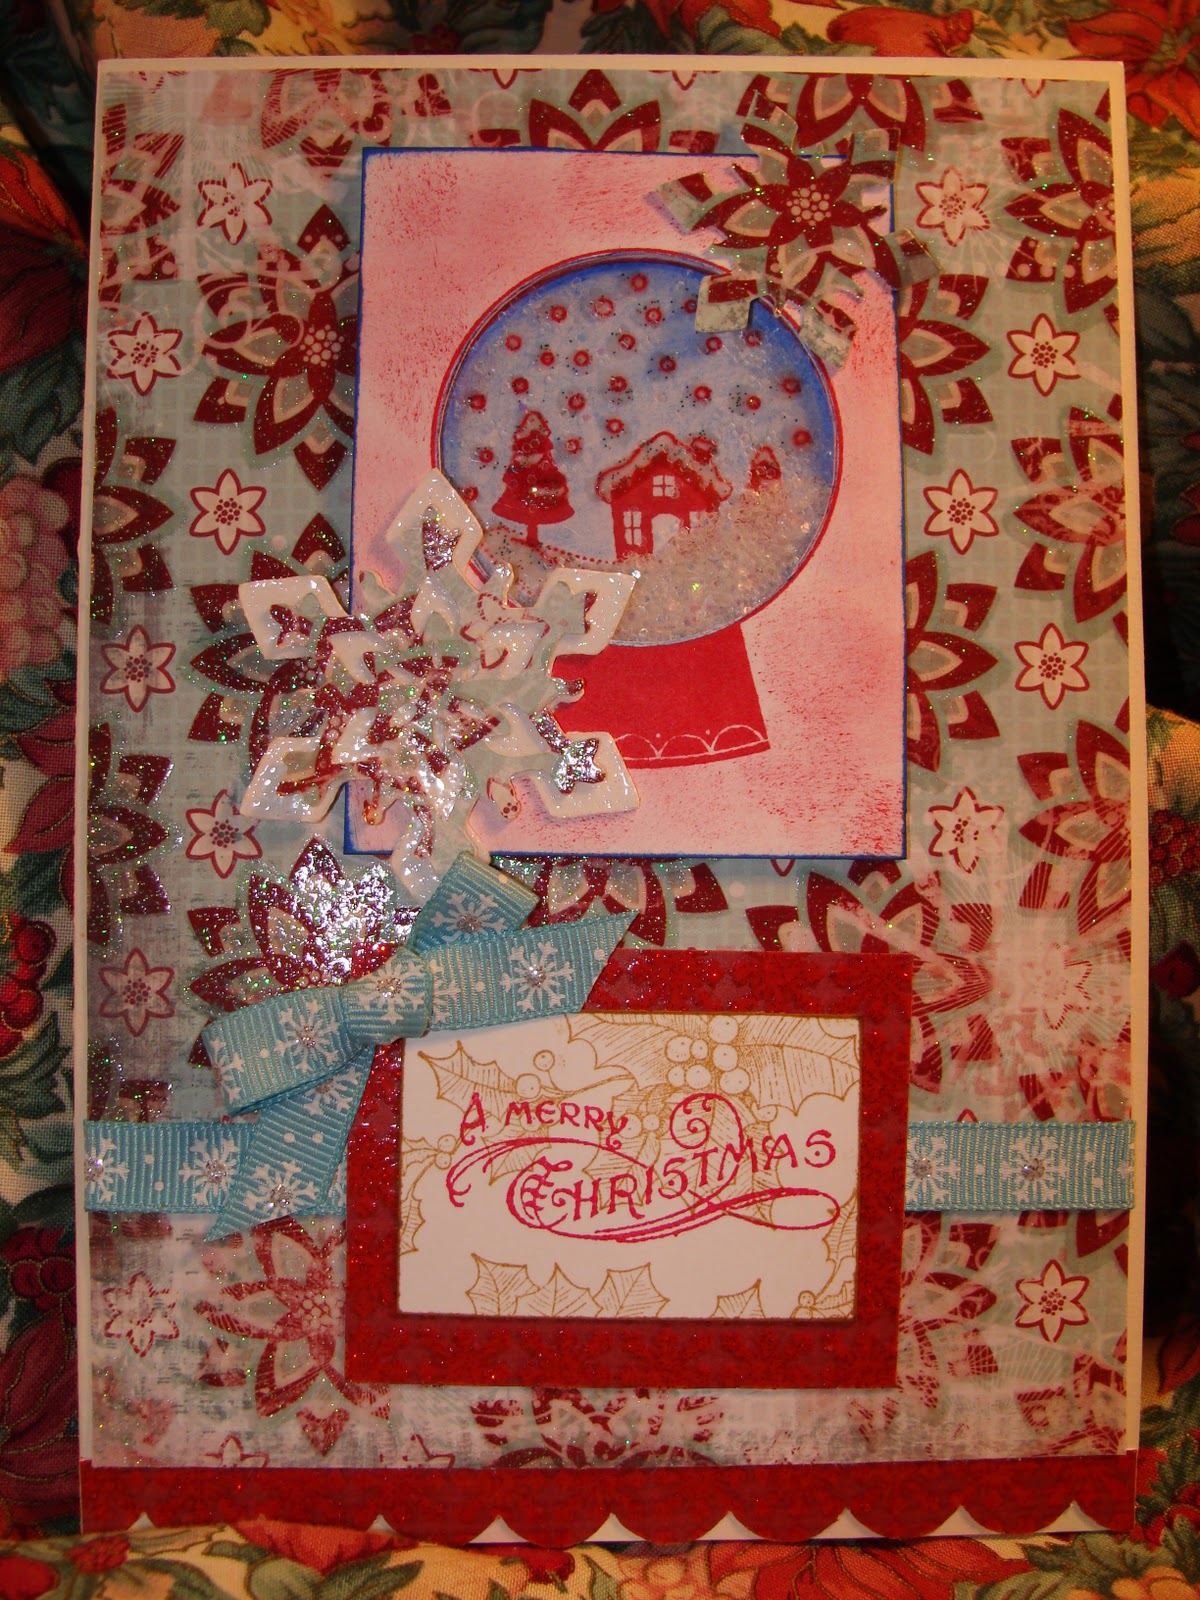
Okay, I have always wanted to try to make some of these "Shaker box" cards and have looked at magazines, and pictures and directions and...so finally I did it! In the wee hours of the morning, I sat down and looked at the magazine and "ding" the snowglobe stamp I had would be a perfect thing to do it with.  So,  I tried it and this is the result! Not to shabby for the first time trying it! I may now get more elaborate with these. Maybe?! The glitter is a large bottle, given to me last year at Thanksgiving, because someone thought that I could use it, I don't know why??? LOL  It has been sitting on my "craft table" since then looking at me and saying, "Use me!". So now I have a use for it! Yippee!  I am thinking of getting more fancy with it and maybe design my own snowglobe with my wonderful, Gypsy!  Some of the snowglobes look like they are snowbound and others look like they got just a dusting of snow.  Opps, I need to find the "happy medium" of the amount of glitter to put in them.  Oh well!

I used:
Christmas Cartridge for the flowers and the snowflakes
My Mind's Eye O Christmas Tree
DCWV The Homemade Christmas Stack
Acetate Sheets
Ribbon from Michael's
StazOn ink
Stampin Up! Sweet Snowglobe
Stampin Up! Bells & Boughs (for the Merry Christmas sentiment on the second card)
Glitter given to me from family
Recollections rhinestones from Michael's


I hope you are having a great day!

Friday, September 30, 2011

46th Wedding Anniversary!

Better late than never, right?  My parents 46th wedding Anniversary was this past Monday, and I am just got around to making and finishing it! I know, I know, I am a "bad" daughter. I just could not come up with a card for them, until...today. It is nothing to elaborate, but I am pleased with it. My mom was so disappointed that she had yet to receive a "handmade card" from me, that she called me to tell me that nothing had come in the mail yet. Hahaha, talk about spoiled!  Well, my hubby drives past their home every morning @ 5am...so the plan is for him to put it in their mailbox. Hey, at least it will have come to them from their mailbox...right???  I know that it is very rare these days for a marriage to last that long, but with God in their lives as a huge focal point that is where they have their success.  They are wonderful parents, and I love them very much!

I Used:
Kate's ABC's Cartridge:   for the "smashed" flowers
Blackletter Cartridge:  for the numbers
Nestabilities Lacy Squares
DCWV The Linen Closet Stack paper
Brown Ribbon from Michael's
Martha Stewart Edge Punch
Square rhinestone brads from my stash
Sentiment is computer generated


I hope that you are having a great day!

Thursday, September 29, 2011

Feel Better Soon!

Hello again! Ohhh, how I hate having to make so many "get well" cards. I don't like it when people I know and care about are sick. Anyways,I made this card for my poor neighbor who is sick. The Dr.s said he may have an inner ear infection but are doing other tests to rule out a tumor or a stroke. He is a little frustrated because he is not recovering as fast as he thinks he should.  So my husband thought that maybe a little card from my craft corner would brighten his day.  Sometimes, just knowing that others are thinking and praying for  you helps you to get through things a little easier. Anyways,I know that you can't really see it but the striped paper has a little sparkle on it.  Also, this is my first time doing the "masking" technique. 

I used:
Gypsy Wanderings Cartridge: for the coffee cup and the muffin
DCWV The Linen Closet stack paper, from Hobby Lobby on clearance
Brown card stock
Cuttlebug folder from Preserves
Brown Ribbon from Michael's
Flower brad from my stash
The Sentiment is Computer Generated


Well, I hope you all are staying healthy and are having a great day!  Thank you so much for taking a look!

Tuesday, September 27, 2011

What am I up to, now?

Well, it is that time of year again for the,"Thanksgiving/Christmas craft".  Every year on Thanksgiving day my Mom's family gets together and celebrates Thanksgiving, over a nice large meal.  Then when all the dishes are done and put away us "girls" get together and exchange a craft/ornament of some kind, that we made.  I usually have to make appoximately 30.  From one year to the next, we could have as few as 20, and the next year about 30.  It is alot of fun to give and to recieve, and to see what they come up with every year.  No, it does not have to be a Christmas ornament or anything Christmas, just a craft.  I enjoy making a variety, so no two are exaclty alike.  Well, this is just a teaser of what I am up to...I will post pictures of the complete project when Thanksgiving is closer or when I have finally perfected my project!  I am already having fun doing this...I may have found another "hobby" that I may enjoy!  What is one more anyways?  So see if you can guess what I am up to now!!! 


Thanks for taking a peek at what I am up to, and guessing!  I hope you have a great day!
  

Saturday, September 24, 2011

Bloomin Birthday!

Good morning everyone! I made this for my wonderful niece, who just turned 15, yesterday. There are 3 young ladies in our family (including my daughter) who are cousins, that are all the same age for about 2 months. They are really close, too! Well, this one niece starts the age difference/change and she is very special to us all. And my daughter is really close to her. So knowing her birthday was coming up, my daughter came to me with her inspiration of what colors she wanted to make, and what she wanted on her card. She wanted me to make my butterflies and some handmade flowers. So we ran with her idea and edited where needed, and this is the result! My daughter had a blast smashing up the flowers and inking up the leaves and getting "green thumbs" from it! LOL I think when my daughter and I work together, we make a great team. We had fun, and my niece loved her card!

I used:
Kates ABCs for the flower pot
Gypsy Wanderings for the flowers cut at several different sizes
DCWV the glitter card stock stack
DCWV The Pocket full of Posies Matstack for the Back Ground paper and the  purple and green flowers
Green card stock for the hand cut leaves
Ribbon from the $1 bin (LOVE IT)
Stickles
Rhinestones
Sentiment is computer generated
Stampin Up! Stamps (I have no idea what the name is) but it was for the butterflies, which were stamped and then I cut it out from the image and then stamped the backside, too.


Thank you for taking a look and I hope you have GREAT day, today!

Friday, September 23, 2011

Classy Wedding, Stair Stepper

You my be thinking that I have been busy "pumping out" cards like crazy, here lately...well, I will confess, this card has been in the works on my table for a few months. I actually had the stair stepper part done a while ago and ended up changing my mind and making another card for their bridal shower. So it is now their wedding card! I still think it needs something but I just can't figure out what it is. I still have time, because the wedding isn't until the end of October. I may add the sentiment "Congratulations" accross the bottom or something like that.  But now I will have to make a visit to Michael's or Hobby Lobby maybe to "stimulate" me. I know, I know, what a bummer that is that I will have to go to the craft stores!  :-)


I used:
Gypsy Font cartridge,for the letters 
Gypsy Wanderings cartridge, for the flowers (crumpled and 3 layers) 
DCWV The All Dressed Up Stack
DCWV the glitter card stock stack (in the flowers and lettering)
Recollections Rhinestone Stickers from Michael's
Heart Ribbon from my stash ( I think I am using up all my ribbon and will have to buy more, bummer!)


Thank you so much for stopping in and checking out my labor of love for my friends and family!  I hope and pray that you have a very wonderful day!

Wednesday, September 21, 2011

Romantic Wedding

I started to make this for one person as a thinking of you, then I changed my mind and added the bride and groom, now I don't know who to give this to.  I have two different weddings in the next month...one would be for my cousin, who I watched grow up into a great young man, and the other wedding is for my aunt who is getting re-married(her husband passed away about 5 years ago). Well when I make my decision I will let you know who it went to. 

I used:
Potpourri Basket Cartridge for the bride & Groom cut at about 3.29"
Gypsy Wanderings for the flowers cut at 1.59" which were crumpled up to give that distressed/layered look
Velum paper for the top layer of the flowers, crumpled
Silver and Mustard Glimmer Mist
Stickles:  Crystal
Recollections Music Stamp from Michael's
Ribbon from my collection
Brads from my stash
Silver embossing ink and powder


Well thanks again for stopping by and seeing what I have been doing, in the past few days, or so!