Thursday, November 17, 2011

Taking Another Look!

Well as promised a while ago, I said I would post pictures of my "Thanksgiving craft".  For those of you that have only recently begun to follow my blog or even if you are just dropping in to check it out...my mother's family every year gets together for Thanksgiving, and all the ladies exchange some kind of handmade gift to eachother.  Ranging from baked goods to Christmas ornaments.  What ever your heart desires.  Mostly we give ornaments, though.  Well, I love glass and Christmas lights and how it all sparkles together.  So I came up with this idea from an old magazine. So here is the results of what this all came to be!

I used:
Inkssentials 2x2 Memory Glass
Inkssentials Memory COPPER foil tape
Copper jump rings
Soldering Iron, and solder and flux
Stampin' Up! Snowflakes, Recollections, Close To My Heart, stamps
Gold and Silver Embossing ink and powder
StazOn Ink
Ribbon from Michael's

Here is the picture I shared with you all way back in September! 
I made about 30 of these and only broke one, not to bad, knowing how thin the glass is.


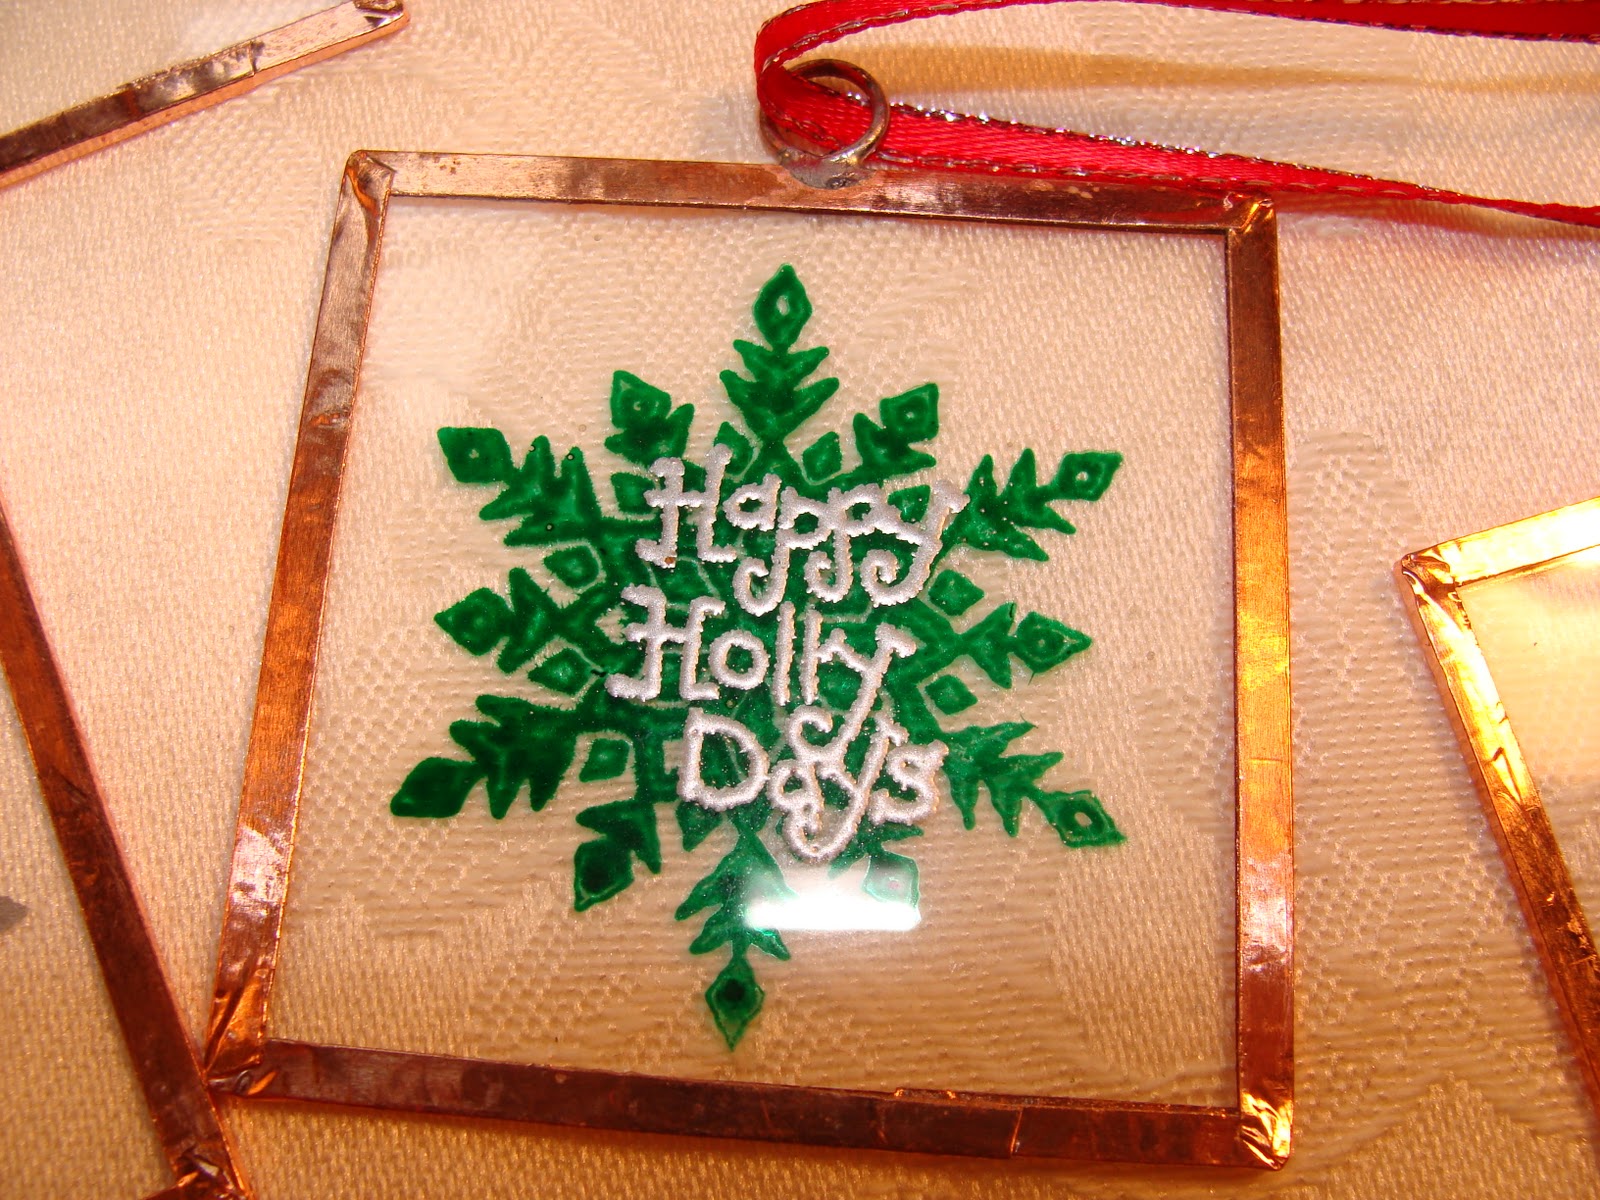
I am fairly pleased at how these turned out.  They were pretty easy to do, too.

Well, thanks for stopping by and being patient and waiting for my "reveal".  Have a wonderful Thanksgiving!


Wednesday, November 16, 2011

Birthday Napkin Fold

Shhhhh, my Mom's birthday isn't until the 28th and I couldn't wait to share her card with you all.  And since she doesn't have Internet she will not know unless one of you squeal!  LOL  So don't spoil the surprise!  I have never made a napkin fold card and this was my first one.  It kinda reminds me of a quilt which my mother loves making quilts.  So naturally I figured that she would love this card, plus she loves flowers and birds.  So I guess that I got a few of her favorite things all wrapped up in this card.  Trial and error is what this card is!  It may not be perfect but...I had a hard time getting the "Punch around the Edge" to work properly. Either way, I am pleased with how it turned out. 

I used:
Martha Stewart Around the Edge Punch
Stampin' Up! Stamps


Tuesday, November 8, 2011

My Hubby's Birthday!

My wonderful hubby had his birthday this past week.  He turned 30 something almost 40!  I won't tell...not yet!  He is such a great man, and God knew what He was doing when He put us together.  But I can't believe that we both are nearing that 40 mark...and that we have teenage children and they will all be in the double digit numbers next year...where does time go???  Well, as the saying goes, "Time flies, when your having fun!"  I guess that is what is happening.  Any who, here is his card.  This one had lots of little tiny details to it, but it was very simple. 

I used:
Stand and Salute Cartridge for the banner
Plantin SchoolBook for the letters
Then I just cut a bunch of squares and rectangles and put ribbon from my stash around them to make them look like presents

Well, thanks for looking and have a great day! 

Birthday Cupcake!

My wonderful neighbor had a birthday last week...and so naturally I made her a birthday card.  She is a fun loving lady and so I decided to make her a fun card!  I used lots of sparkly paper and lots of brads as sprinkles to make it look yummy! 

I used:
Sweet Treats and my gypsy to make all the layers and the shaped card
DCWV The Glitter Card Stock Stack

Brads and ribbon from my stash
The sentiment was computer generated

Thanks for taking a peek and have a terrific day!

Time Ticks By So Fast

On October 23rd was my 18th wedding Anniversary!  Whoohoo!  I wanted to make my wonderful hubby a simple card that didn't have a whole lot of fancy stuff on it...that was really hard for me not to go overboard!  So I came up with the clock idea and designed it on my gypsy.  Then came up with a little quote that went along with it for the front and then completed it on the inside.  He liked the clock and its "movable" hands.  I just did a simple gate fold card and used the clock on the front and then two hearts on the inside.  My wonderfully talented daughter made the beaded center for the heart.  I really struggled not putting some kind of fancy ribbon or lace on this but I just had to be happy with the glittery paper.  He liked it and that is what matters!

I used:
Plantin SchoolBook Cartridge for the making of the clock and the hearts
Fiskars Border Punch
DCWV The Glitter Card stock Stack


Another Autumn Tree Card/Shaker

Sorry my dear friends, that it has been a while since I have posted anything.  I have been very busy lately but I still had time to make some cards but just not the time to post them all.  So look out, here come a bunch of posts!  LOL 
Any who, this card is alot like the last one but, it is a shaker!  I was digging through my scrap drawer and found a baggie with a bunch of these leaves that I had cut out about a year ago.  Then I got this idea to use them for a shaker card.  So this is what I did.  I made this for my BIL's Birthday!  I hope he liked it!  I know I really enjoyed looking at it and shaking it to make the leaves move around! 

I Used:
Stretch Your Imagination Cartridge for the Tree and Leaves
DCWV The Glitter Card stock Stack for the leaves and background and frame
Brown Card Stock
Ribbon from my stash

Stamp is from my stash from Dollar stores
Well, thanks for checking out what I have been up to lately!  I hope you have a blessed day, today!

Saturday, October 15, 2011

Autumn Get Well

Good Morning my friends! You know that dream state that we have right before we wake up...?  Well, when I fall a sleep thinking about cards, in that dream state is where some of my best cards come from.  You could kinda say that I make/design my cards in my sleep!  LOL  Well, this is one of those dreamed up cards.  Yes, if you look back through my cards, I have made one of these alot like this one...but when you are making a card for someone you don't really know alot about and it is a GUY, you kinda don't have a  whole lot of choices.  Well, this is for a man in our church, who he and his family are new to our church...he just recently had major shoulder surgery and is in alot of pain.  So I wanted to be an encouragement to him and his family, so naturally I had to make a card, because that is one of my best ways to be an encouragement.  I hope and pray that he has a complete and quicker recovery than he is told.  Overall, this was a quick and simple card to make.

I Used:
Stretch Your Imagination Cartridge for the Tree and Leaves
Martha Stewart Classic woodland Paper Pad for the background paper
DCWV The Glitter Card stock Stack for the leaves
Brown Card Stock
Brown Ribbon from Michael's Dollar bin
Stampin Up! For the sentiment


Thank for stopping by and I hope your day is filled with many blessing!

Thursday, October 13, 2011

Pastor Appreciation Month

Did you know that October is Pastor Appreciation Month?  Well, it is!  In earlier post I had made a card for one of our pastors.  Well, I still needed to make one for our other pastor.  So this is what I came up with.  This particular pastor's favorite color is blue, and he loves butterflies too!  He loves God's nature and beauty.  So I just put some of his favorite things together and made this card for him. 

I used:
Kate's ABC's Cartridge: for the flowers
Sentimentals Cartridge: for the butterfly
K&Company Amy Butler Designer Paper
Tattered Angles glimmer mist:  Mustard
Distressed sheet music
Rhinestone brads
Ribbon from my stash


Well, thank you for looking at what I have been doing!  I hope you are having a good day today!

Monday, October 10, 2011

Some Scraps & A Thank You

This card was made somewhat from my scraps drawer. This month is pastor appreciation month and my hubby informed me at about 12am Satuday night that we needed a card for our pastor,  for everyone to sign the next morning. Ahhhh! No pressure!  Then I remembered that I had this stamp already colored and cut on a circle.  I also knew it would be the perfect color scheme for a more gender neutral type of card, being that the apprection is not just for our pastor, but also his wife, who sacrifices so much for her husband to serve and give so much time to the church.  So I started on the card and ran with what I had to get it started...Thank God for scraps and quick creative thinking! So this is what I came up with that night in about an half hour. Not bad if I do say so myself. Whew! That was just a little of a short notice, but sometimes I think my best work come from those moments of "short notice".  At the same time I love that my husband has gotten so used to me making cards that he likes and expects me to make all of them from now on...except when the card is for me, of course!  LOL

I used:
Plantin SchoolBook Cartridge for the circle cut
Spellbinders Nestabilities Lacy Squares
DCWV The Linen Closet Stack paper for the BG paper and the square
K& Company Life's Journey for the brown  BG paper
Stampin Up! Butterfly picture (not sure what that set is called anymore)
Recollections stamps from Michael's for the sentiment
Pebbles Inc. Chalk to color the butterfly and give it all a little sparkle
Ribbon from my stash

I hope you all are having a great day and thanks for
stopping in!

Wintery Window

Okay, now I am getting a little to carried away with my "shaker" cards. I am very pleased with how this one turned out! I am not sure who will receive this one, but I will have to "hand" this to someone and not mail it. We will see! These are alot of fun to make. My problem is that I can't wait to put the acetate on and the glitter between to see the "snow globe" affect, but I have to wait for the stickles to dry before I do all that.  Arrrr!  I do heat it up a little with my heat gun, but that tends to make it bubble/blister if I am not careful.  I guess, patience is not one of my virtues!  I will make my tutorial for this in the next few posts, so be watching for it! 
 
I Used:
Christmas Cartridge for the trees, and house
Christmas Cards Cartridge for the actual shape of the card
Winter Woodland Cartridge for the branch across the top
Plantin SchoolBook Cartridge for the basic card shape
Gypsy Wanderings Cartridge for the frame around the window and for making the acetate cuts slightly larger
DCWV The homemade Christmas Stack for the card and the frame
DCWV The Glitter Stack card stock
Acetate (from Office Max)
Green,  two different browns of card stock for the house, and trees
Glitter (from my Aunt)
Ribbon from Michael's (last year)
Stampin Up! Bells & Boughs (for the Merry Christmas sentiment)


Thanks for taking a look and I hope you have a very wonderful day!